MS Excel: How To Wrap Text In Excel

Excel’s wrap text option is very useful if you want to show the entire text in a single cell in an Excel worksheet. This increases the value of the work in the Excel worksheet and the work looks neat and clean and presentable.
By default wrap text option is in disable state means if the text is too large then either it will overlay on the adjacent cell or the text cut by itself by the boundary line of the cell. An example is shown below image:
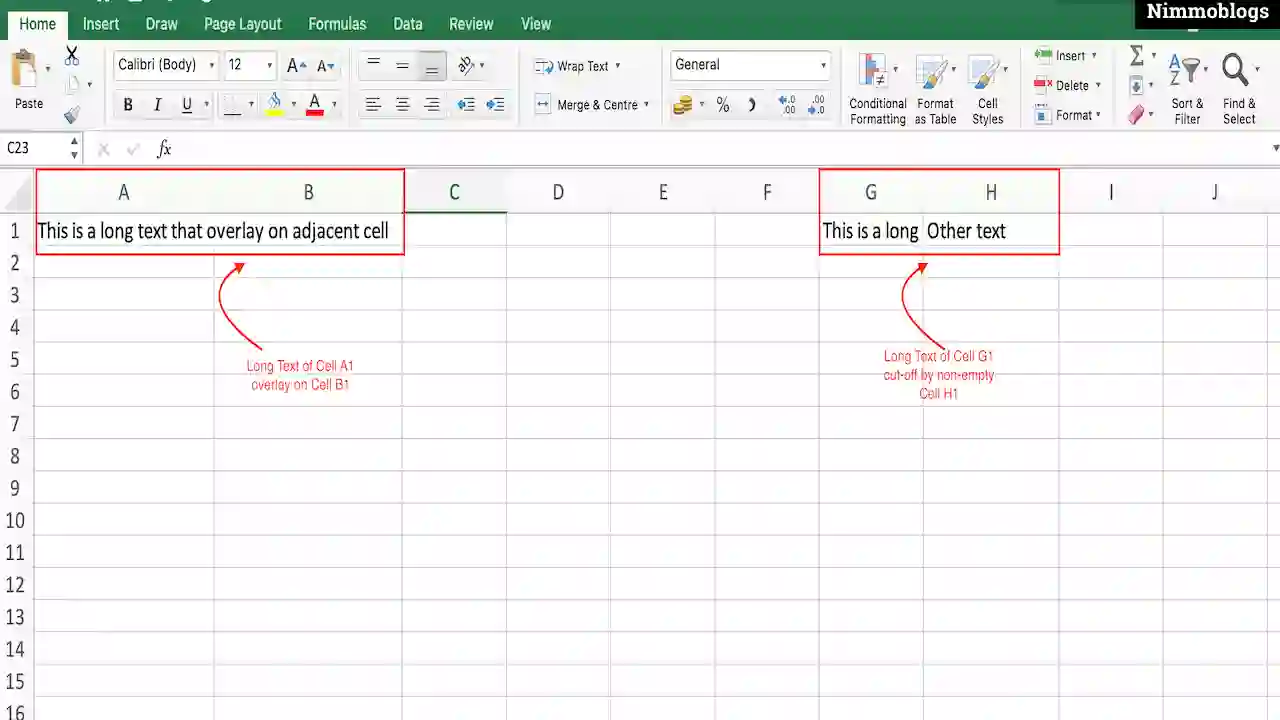
|
Enabling the Wrap Text Option
Excel Wrap Text option can be enable using two ways. This is just a simple process, you just need to select the cell containing long text that you want to make visible in a single cell and apply one of the methods explained below:
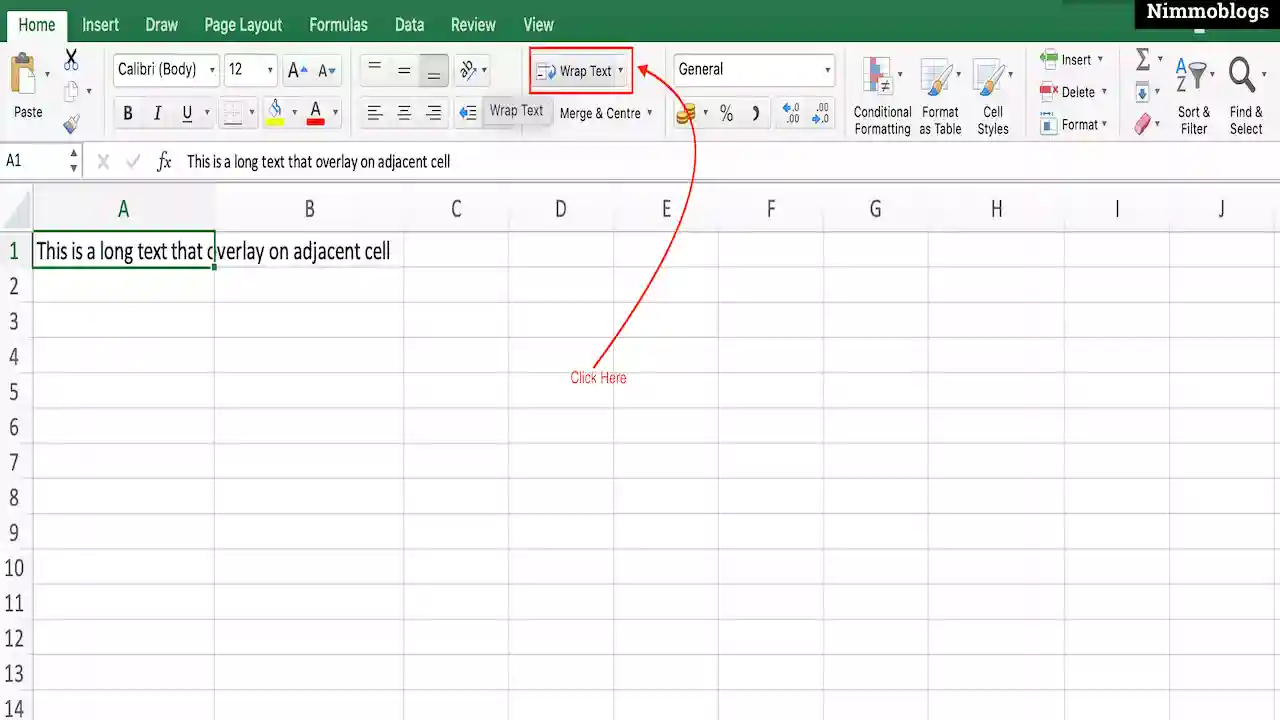
Method 1
- Select a cell that contains long text.
- Click on Wrap Text option, present in the Home ribbon at the top (Refer Image).
|
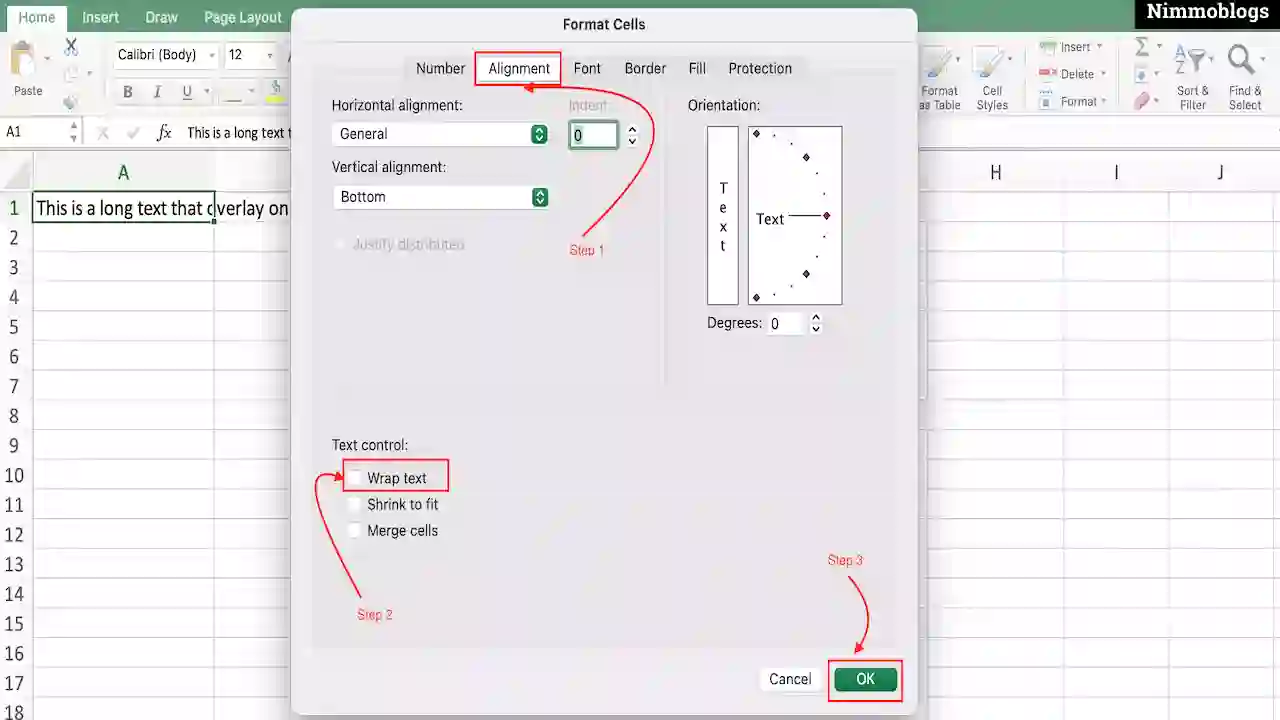
Method 2
- Select cell of long text.
- Open Format Cells dialogue box EITHER by right click on a cell and select Format Cells options OR Use shortcut ctrl+1 (In Windows), Command + 1 (In Mac) to open Format cells dialogue box.
- Inside the Format Cells dialogue box:
- Select the Alignment Tab.
- In the Text Control section Click on checkbox of Wrap Text.
- Click on the OK button to save the changes and apply wrap text in a cell.
|
Forcing Line Breaks at Specific Points
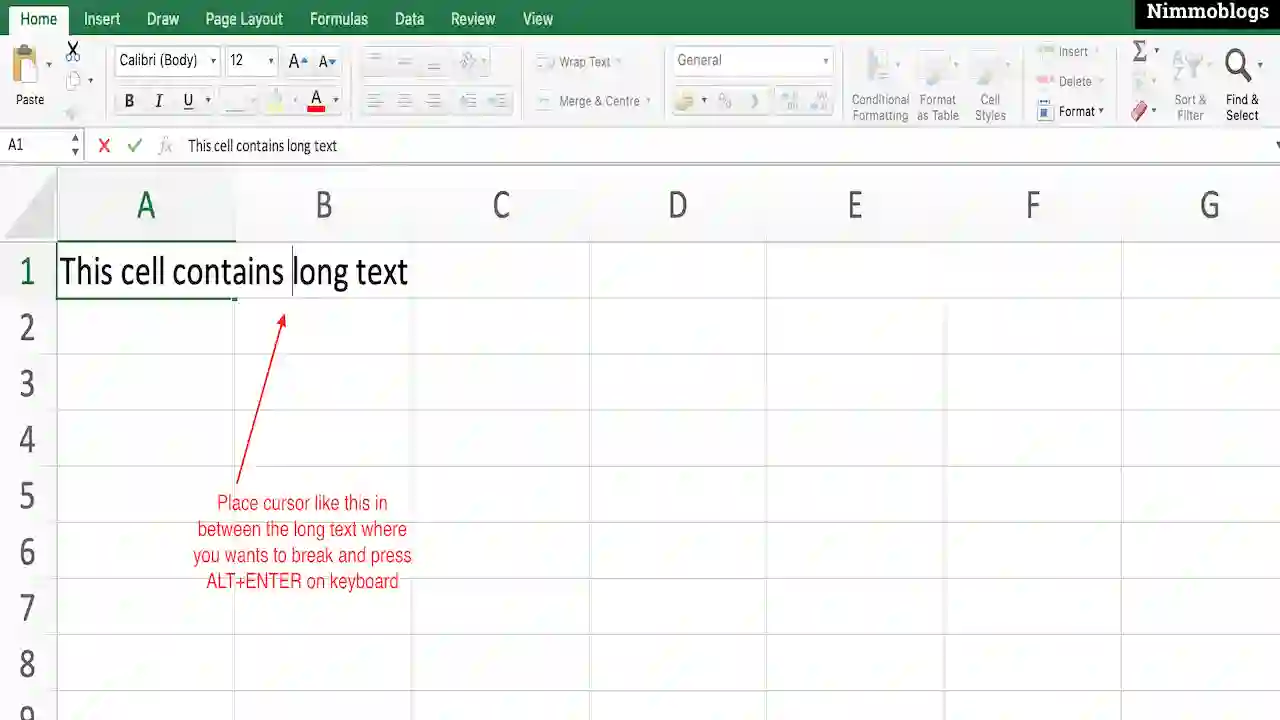
Excel provides a way by which you can break long text at the specific position from where you want to break. The procedure for this is given below:
- Select a cell that you want to edit.
- Double click on a cell to open the edit mode of the cell or use shortcut f2 or click in the Formula bar.
- Now, put your cursor where you want to break the line and press the shortcut of break line on the keyboard i.e. alt+enter.
|
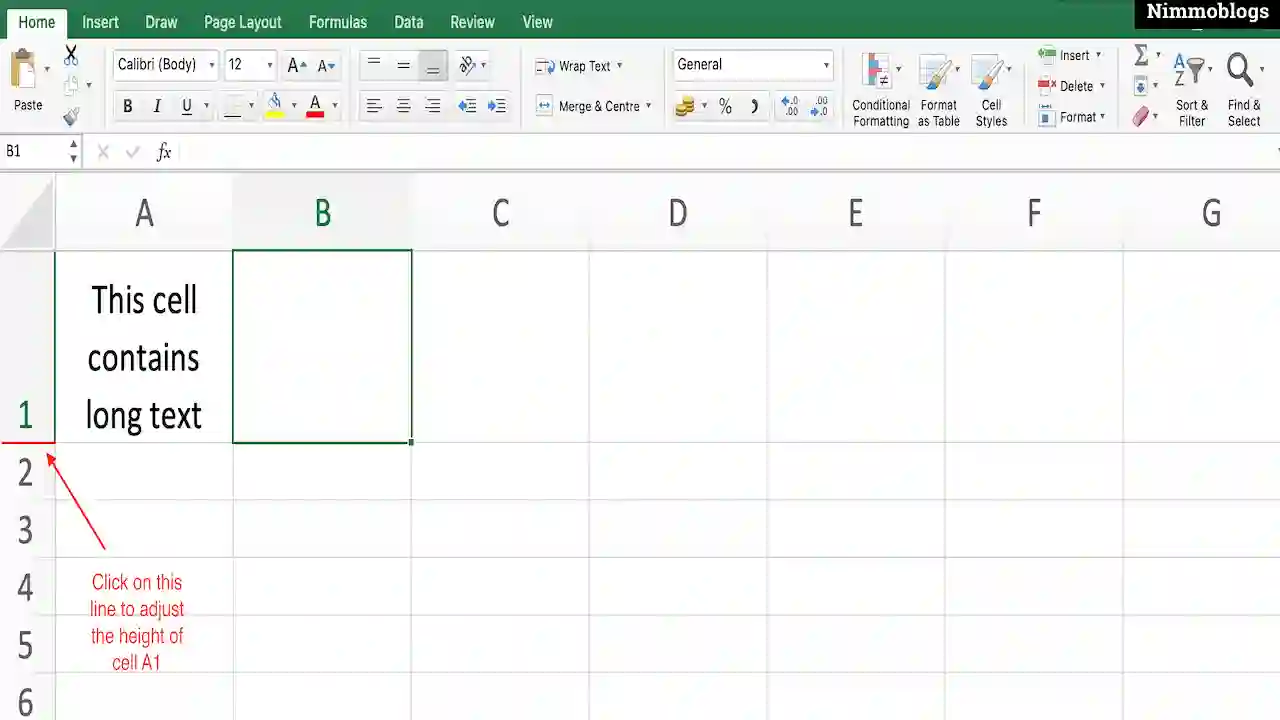
Resizing Cells with Wrapped Text
Excel cell automatically may or may not adjust its height while applying wrap text based on the settings of the Excel worksheet. This happens because the cell needs to show the entire text inside the cell.
Excel also provides a way by using that you can adjust the height of the cell according to choice. You can force the cell to show a particular height. Simply you need to Click on Row labels present on the left side of the Excel worksheet.
As shown below, To adjust row 1st, double-click on the line present between row A and row 2 in the worksheet. Need to click on the row label area that is available on the left denoted by 1, 2, 3, and so on.
|
Resizing Merged Cells with Wrapped Text
Excel auto-sizing of the cell will not work on Merged Cell. If you want to resize the height of the cell that contains long text or applied with wrap text and also the cell is a Merged cell then you have to resize manually by dragging the line between rows.

Goal Setting: How To Set Goal In Life

Podcast: How To Cancel Spotify Premium

Podcast: Podcast That Should Listen

Podcast: What Is Google Podcast

Podcast: What Is Podcast And How Does It Works

Time Management: Good Time Management Skills

Time Management: How To Improve Time Management Skills

Top 25 Ways To Increase Productivity

Robotics: What Is Robotics And How Does It Work

Positive Thoughts: Positive Thoughts Can Change Your Life

How To Become Rich With No Money

Top 5 Ways To Become A Rich

Communication: Top 7 Ways To Communicate Effectively

Personality Development Tips For Men

Personality Development Tips For Woman
©2026 Nimmoblogs
All Right Reserved.
Made with
 by Hina Aggarwal